Ihre Sprache: Diese Seite in deutsch
Contents: Selecting or adiministrating account data | Retrieving and Deleting messages | Viewing messages and saving attachments
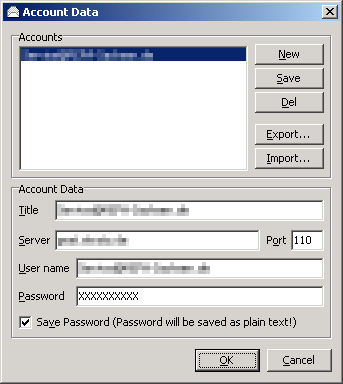
Right after you have started POP3DA you get viewed the Account Data dialog where you have to enter the connection and login data for the POP3 account you want to connect to.
Your options are
If a different account is selected click New to clear the form.
Then enter the following data in the Account Data group:
| Server | Host name or IP address of the POP3 server the account is hosted on |
| Port | TCP Port number of the POP3 server (normally 110) |
| User name | User name of the POP3 account (often the same as the E-Mail address) |
| Password | Password of the POP3 account |
Click OK to proceed.
If the accout you want to connect to is in the Accounts list select it.
Proceed by clicking OK.
Click New to clear the form.
Enter the account data.
You have to enter additional data:
| Title | Name of the Account Data record (you may name it like you want) |
| Save Password | If checked the password will be saved too (but be aware that it is saved as plain text into your user registry, which can be accessed by all administrators and applications with your user or administrator privileges) |
Click Save.
Select the account to alter in the Accounts list.
Change the account data. You can also change the additional data.
Click Save.
If you want to take the accounts listed to another computer or user you can export them by clicking Export. You then have to enter a name for the file to save the exported account data.
Warning: Be aware that passwords will be exported too and therefore will be visible to everyone who gets the export file.
Click Import and select the export file. As there is no function for checking account titles to be unique you may have to check and rename accounts manually.
After having selected a POP3 accout to use you can see the main window with it's Controls on top, the Messages list in the middle and the Message Header group, System Info group and Status Bar at the bottom.
Your options are

Click Get Mail to retrieve all emails (which means email headers only) from the selected POP3 account. If the Get Mail button is disabled there is no POP3 account selected an you have to select one first.
You can abort the retrieving process any time by clicking the Abort button.
The process can take several minutes according to the speed of your internet connection, the spped of the mailserver and the number of emails in the inbox. You can see some status information at the Status Info group such as the number of emails. The Status Bar will inform you which email is currently retrieved. If thre are any problems retrieving emails, e.g. timeouts, it will be logged in the Status Info group.
After all emails are retrieved they are listed in the Messages list, which displays the following data:
| From | Name and email address of the sender |
| To | Name and email address of the addressee or a list of addressees |
| Subject | Subject of the email |
| Date | Time and date the email was sent |
| Size | Size of the email with all attachments (in bytes) |
| MsgID | ID of the email message |
Select an email in the Messages list to view the whole email header in the Message Header group.
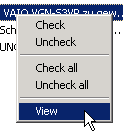
First, check all emails to delete in the Messages list. You may use the context menu if you have to check a lot of emails. Click with the right mouse button and select:
| Check | Checks all selected emails |
| Uncheck | Unchecks all selected emails |
| Check all | Checks all emails |
| Uncheck all | Unchecks all emails |
Then click Delete and answer Yes when aked if you're sure.
You can abort the deletion process any time by clicking the Abort button.
Warning: Be aware that deleted emails will not be restored by aborting the deletion process.
The Status Bar will inform you which email is currently deleted. If thre are any problems deleting emails, e.g. timeouts, it will be logged in the Status Info group.
After all checked emails are deleted you may update the Messages list by retrieving all emails left again.
Select an email in the Messages list and double click it. The dialog for viewing emails and saving attachments will open.
You can also right click the email and select View from the context menu.
Click the Account Data button and select the POP3 account in the Account Data dialog.
Emails an their attachments are viewed in the View Message dialog. The Message Data or email header data are viewed on top. The email body is devided into two types of Message Parts:
| Text parts | All parts of an email containing plain text, html or some other type of text will be listed in the Text Parts list |
| Attachments | All file attachments of an email will be listed in the Attachments list |
Hint: To view an email it has to be donloaded copmletely including all attachments. You will be asked before downloading emails bigger than 100 kB so you can decide if it's worth the time and the bandwidth to see the email's contents.
After the email is downloaded, your options are
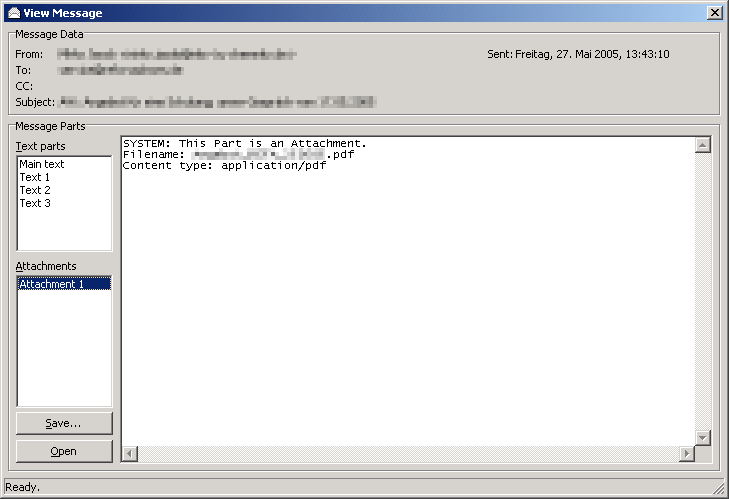
Select a text part from the Text parts list.
The contents of the text part is shown in the text box right from the list. If the text part has a special format, e.g. HTML, it will still be shown as plain text. Therefore you don't have to worry about virus scripts inside emails. They cannot be executed.
Hint: There is always a text part called Main text. If an email has only one part it is that one. Otherweise the Main text will state that the email has multiple parts.
Select an attachment from the Attachments list.
Some information about the attachment, such as file name and file type, will be displayed in the text box right from the list. At this point, nothing was done with the attachment itself. Even if it's a virus it is not executable.
Click the Save button below the Attachments list to save the selected attachment into a file.
Or click the Open button to save the selected attachment into a temporary file and directly open it with the default application associated with the file type.
Warning: If the attachment contains a virus it will be executed without warning unless your antivirus software can detect the virus. If you're not sure about the contents of the attachment you better save it to a file and scan the file with your antivirus software.
Last change of page 2005/06/02, Copyright ©2005 Michael Berthold
![]()
![]()